Nail It at CVS/pharmacy Nail HQ™.

It's a fact. Women are obsessed with their nails. CVS/pharmacy says that nail sales are booming. That's why they are making more room in their stores just for all the great nail innovations that us women want.

cvs_Nail-HQ.jpg

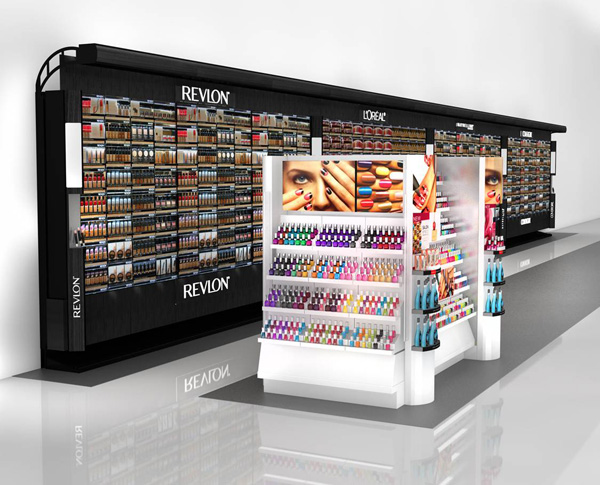
The new Nail HQ™ is now in more than 2,000 locations! This little section of the store, in mine at least, is right at the end of the cosmetics section and cannot be missed. The cube like Nail HQ™ department offers access to drugstore firsts like the new gel nail technology from Sally Hansen and SensatioNail, and trend-setting launches from brands like essie and Nuance Salma Hayek. It is super convenient and always affordable.

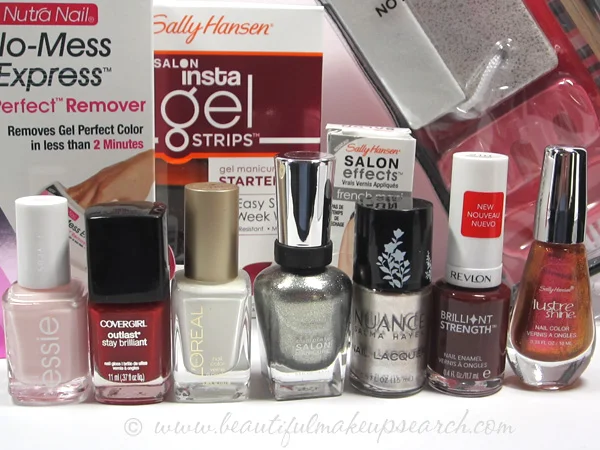
I, for one, love that my favorite polishes are local and easily accessible. Check out a few of my favorites from essie, COVERGIRL, L'Oreal Paris, Sally Hansen, NUANCE and Revlon.

cvs_nails_close.jpg

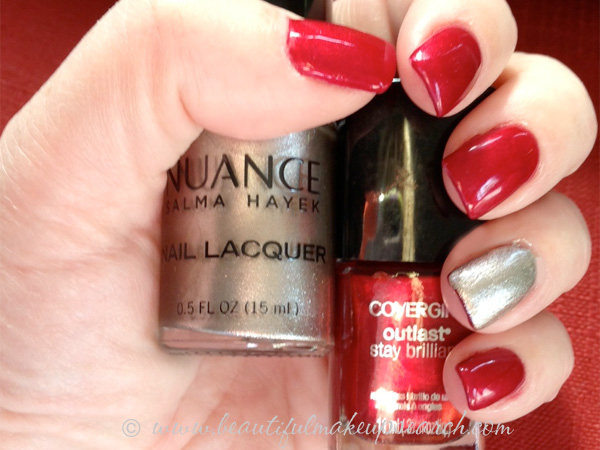
Of course I had to create a little holiday manicure myself. I used COVERGIRL Nail Gloss in Forever Festive with NUANCE Salma Hayek Nail Lacquer in Goldstone on one nail as an accent.

cvs_mani.jpg

To keep up with the latest, be sure to follow @CVSBeautyClub on Twitter and CVS Beauty Club on Facebook.

COVERGIRL Outlast Stay Brilliant Nail Gloss.

Finally. COVERGIRL has gotten into the nail polish game and just launched a line of nail polish, or as they are calling it, Nail Gloss. If you wondered why they have waited so long, I think the formula says it all. This is a game changer. Introducing COVERGIRL Outlast Stay Brilliant Nail Gloss.

COVERGIRL Outlast Stay Brilliant Nail Gloss

Just looking at the bottle, I knew it was going to be good. First, just look at the packaging. The bottle is a very heavy glass, with a large square cap. It is very Chanel-esque, if I dare say so. The brush is very full, with bristles long and firm enough where they don't flop all over, but easy enough to easily apply the polish.

Now look at the formula. Just by looking at it, you will notice is is not too thin, nor thick. It is almost a gel-like liquid.

COVERGIRL Outlast Stay Brilliant Nail Gloss

What is super special about the formula is that it is an all one formula. No base coat or top coat is required. No. I'm not crazy. The colors can last and stay glossy for as long as 7 days, with zero topcoat required.

I am the first to admit, and I have said it her many times; I suck at doing my own nails. I cannot give myself a manicure, and have depended on the same manicurist for years. I did want to try this and check it out for myself, so I took the COVERGIRL 7 Day Challenge. I painted my nails with this new polish and took a photo of my nails every day for seven days.

I need to say that the polish was very easy to apply. Like I said, the formula is almost gel-like, and applies very smooth and even over nails. It was a simple two or three brush stokes to get full coverage. I actually did two coats with the shade I selected, Smokey Taupe. The polish dried to a super glossy finish fairly quickly too. After about five minutes, my nails felt dry, but were still tacky. I was comfortable enough to use my hands after twenty minutes, when the polish was fully set and totally dry. Already I was impressed.

So onto the 7 day challenge. How do you think I did? How do you think it lasted? Take a look below.
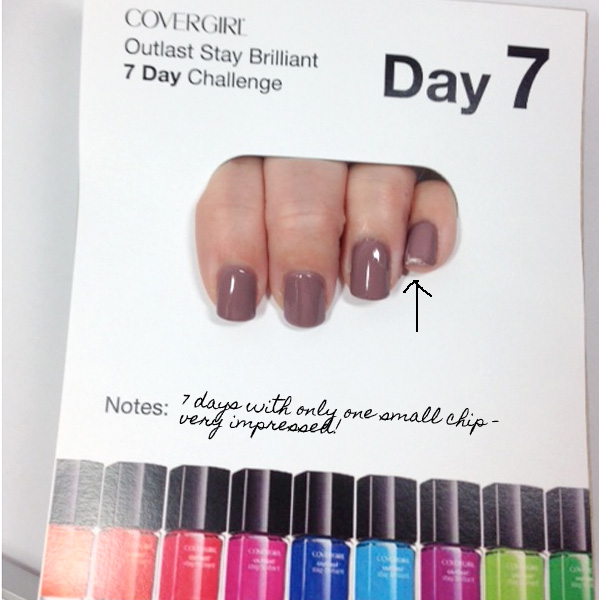
 

COVERGIRL Outlast Stay Brilliant Nail Gloss

The images speak for themselves. The glossy color lasted on my nails for 7 days, with just one small chip that happened shortly before I snapped the final picture. My nails looked beautiful and glossy for the week. Seriously, when is the last time that you could apply a drugstore polish and have it last for a week? Not just last, but last with full glossy shine and no top coat? It's a first for me!

I need to disclose that I have gel overlays over my natural nails. I am not sure if this affected the challenge for the better or not, but I felt it important to note. I did not apply any base or top coat, as stated.

Outlast Stay Brilliant Nail Gloss is for sale at drugstores and mass retailers right now, for about $5.49 a bottle.  There are 15 shades available right now, and a full 45 shades will be for sale come January. When all the shadea are relased next year, I will be back with a complete list of shades and of course, more pictures.

Makeup Wars: My Halloween Manicure.

This week, us ladies from Makeup Wars are taking on the challenge of creating a Halloween Manicure. I have to say that I was super excited about this post because I am a huge fan of nail art. Sadly, I am nail art challenged. Well, honestly, I am nail polish challenged. I haven't been able to give myself a decent manicure for years. Thank goodness for Gina who has been doing my nails for longer than I can remember so I don't have to leave the house without beautiful looking nails. So what's a nail challenged girl to do? She, meaning me, finds some great nail polish strips.

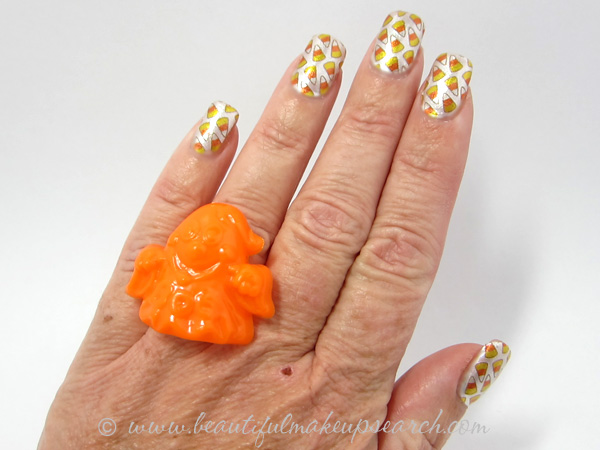
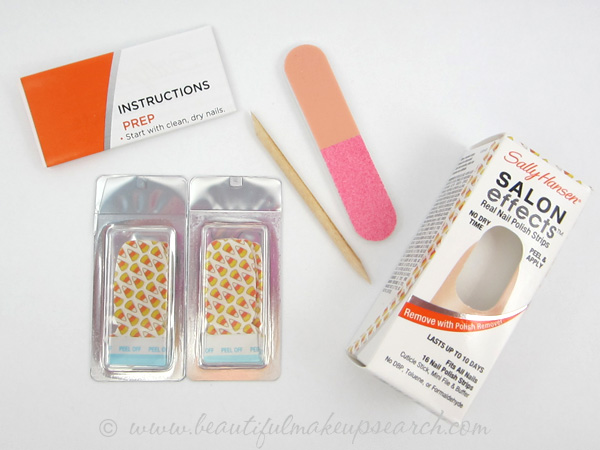
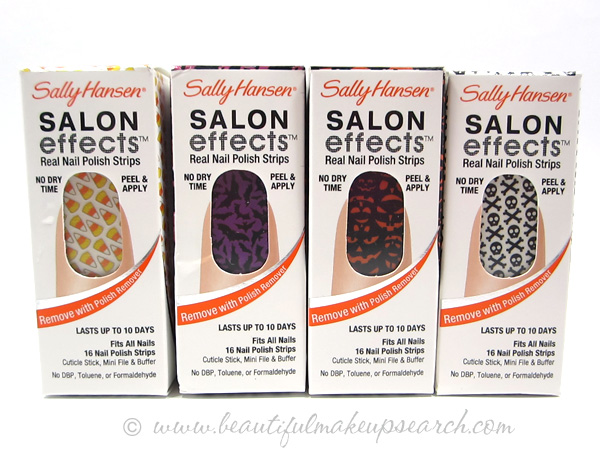
Now these are not just any nail strips; these are pre-designed Halloween nail polish strips that have me sporting the latest Halloween nail designs. These are the How Corny Sally Hansen Salon Effects Real Nail Polish Strips. They are definitely my favorite out of this years Halloween designs.

I like the silver glitter polish with yellow, orange and white candy corns.

What is so great about the nail polish strips is that they are so easy to use. They apply in a few simple steps and there is no dry time at all. You get everything you need to apply the nail strips in the little "kit". You get 16 Nail Polish Strips, a cuticle stick and a mini nail file and buffer.

Sally Hansen Salon Effects Halloween Nail Strips

To use the strips you first need a clean dry nail that is lightly buffed with the white side of the file. Then you follow the easy instructions:

  • Select the best fitting strip for each nail.
  • Remove the clear protective plastic cover.
  • Peel the nail polish strip from the backing paper.
  • Choose the side of the strip that best fits the shape of your cuticles. (I usually select the side opposite of the gray tab)
  • Place the strip against the cuticle line, holding the strip in the center.
  • Press the entire strip to the nail by gently stretching it for a perfect fit.
  • Smooth it out with another finger.
  • Gently file away the excess nail strip that overlaps outside of the nail.

To remove the nail strip, you simply use a normal nail polish remover as you would to remove regular nail polish.

The other designs I have are the Numbskull design, the Batty For You design, and the Patch-O-Lanterns, but I like the look of the candy corn designed How Corny designs the best.

Sally Hansen Salon Effects Halloween Nail Strips

Check out all the Halloween designs at your favorite drugstore or mass retailer. Each box of Salon Effects Nail Polish Strips sells for around $9.99 each.

Be sure to check out all the Halloween Manicure designs from my fellow Makeup Wars friends below.