Mario Badescu Peptide Renewal Serum & Cream.

My number one skin care concern right now is aging, and everything that comes with it. I have sun damage and I am not getting any younger. I am concerned about my skin and do what I can do make it look as young as it can. Well, without turning to injections, botox, or plastic surgery. Though I am considering some botox. Soon.

In searching for some new skin care to try, I discovered this new Peptide Renewal Serum and Peptide Renewal Cream from Mario Badescu. After discovering how much I like their products last year, I couldn't wait to try this new age fighting duo.
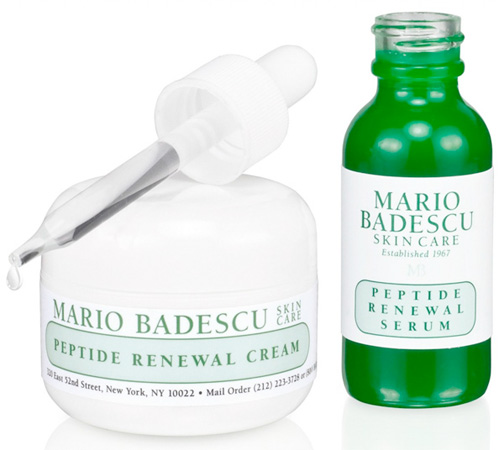
Mario Badescu Peptide Renewal Serum & Cream

This cream and serum combine peptides with youth-boosting botanicals to recover a firmer, contoured, more youthful appearance. I like the sound of that. They treat all those signs of aging skin that I am battling - wrinkles, sagging, uneven texture, and lack of hydration.

See also: Adding Mario Badescu Serums into my Skin Care Routine

I have been applying both the serum and cream at night. I use a few drops of the Peptide Renewal serum and rub it over my skin and let it absorb. I follow that with the Peptide Renewal Cream. This cream is really thick and it was meant for those of us with very dry and mature skin. I am liking the way my skin is feeling with this combination. Of course it feels nice and hydrated as soon as I apply it, but I don't feel as though my skin gets as dry as it has been during the day since using. I also feel like I just look better when I wake up. I haven't used it long enough to pinpoint everything it does, but just the notice in feel and better hydration alone is enough for me to continue and keep it in my routine.

Mario Badescu Peptide Renewal Serum retails for $45, and the Peptide Renewal Cream retails for $35.00. They are available at Nordstrom and at mariobadescu.com now.
The Best Self-Tanner EVER: Vita Liberata
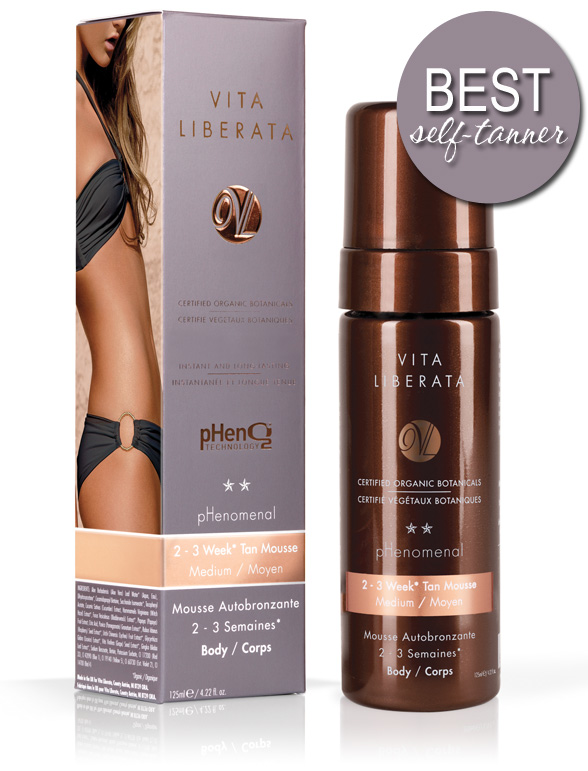
 pHenomenal 2-3 Week Tan Mousse.

The Vita Liberata
 pHenomenal 2-3 Week Tan Mousse is the best self-tanner I have used, ever. Am I overstating this remark? No. It is that good.

The BEST Self-Tanner: Vita Liberata pHenomenal 2-3 Week Tan Mousse

This self-tanner was created with the brands pHenO2 technology. I don't really know what that is, but whatever it is, it is developed so this self-tanning mouse is completely odorless, light, airy and super long-lasting. It dries within a minute. Literally. I can get dressed immediately after applying. 

When I say Vita Liberata
 pHenomenal is super long-lasting, it really is. The brand claims that it lasts 2-3 weeks, but you have to apply it as they suggest. They suggest three applications, within 3 - 24 hours each. I applied it one night and then again the next morning and had a really dark, but believable self-tan. I noticed some fading around ten days, but still had traces of it on my legs after two weeks. I suppose if I wanted to be really dark and need it to last longer, I would apply the three applications as instructed. Though I didn't, this was more than good enough for me. I previously had a consistent self-tanning routine where I applied twice a week. I never thought I could have a self-tanner last this long and only applying every two weeks is a dream come true.

See also: 10 New Self-Tanners

Vita Liberata
 pHenomenal is super easy to apply with their tanning mitt that I highly recommend you purchase. For only $6.50, this mitt will help you to apply this mouse seamlessly and evenly. I use one pump of mousse for each section of my body, meaning each leg, arm, back, chest and neck. I haven't applied this to my face yet, but for those of you that are daring or want a darker self-tanned face, I would say go for it.

Don't miss this self-tanner. You can choose from Fair, Medium or Dark. I use Medium. It is expensive at $54.00, but it is so worth it. I have used Vita Liberata
 pHenomenal three times since I received it almost two months ago and I still have 3/4 of the bottle left.

Purchase Vita Liberata
 pHenomenal at Sephora.

Makeup Wars: My Must Have Hair Tools.

I am obsessed with a great blowout. If I could have a professional blowout everyday, I would be one happy gal - with great hair. Seriously? Don't you feel better when you're rocking a beautiful bouncy blowout? Luckily, I have learned to do my own blowout at home. The key to the perfect blowout is the right tools and products.

For products, I like a product that initially smoothes my hair, as in defrizz and seals the cuticle to prevent it from fizzing in the first place. I use the original Moroccanoil Treatment for that. I also like a volumizing mousse, because I like a lot of volume and need the extra hold it gives. My current mousse of choice is Dove Nourishing Curls Whipped Cream Mousse. Finally, I need a hairspray to hold my style in place, and I only use L'Oreal Paris Elnett Satin Hairspray (unscented) for this finishing touch.

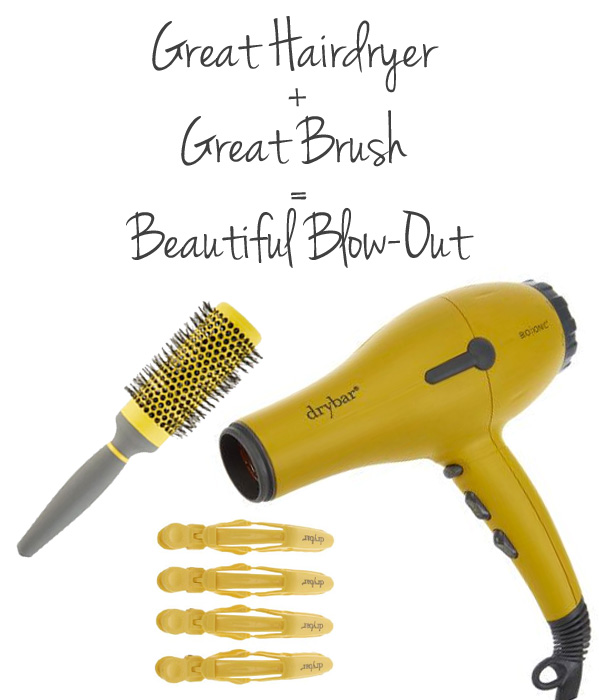
For tools, I need a great hair dryer and brush. The best hair dryer I have ever tried is from the famed blow dry bar, Drybar. They only do blowouts, so I trust that their tools are the best.

Must Have Hair Tools and How to Get the Perfect DIY Blowout

I use the bright yellow Buttercup Blow Dryer. This professional hair dryer has a powerful 1875 watts of power that is surprisingly quiet. It delivers a powerful airflow while being gentle on hair. It has three temperature settings, two speed settings, a self-locking Cool Shot button, and a narrow concentrator for fast styling. It is super lightweight, so my arms never get tired. My hair is dry faster with this dryer than any I have ever tested as well.

See also: My At-Home Hair Color Disaster

Along with the dryer, I depend on the Full Pint Medium Round Brush. This helps to smooth my hair while adding in big soft curls.

To aid in drying my hair in sections, I use the Drybars Hold Me Clips. These have a self-locking system that allows for large sectioning. They grip the hair gently, so I never experience pulling.

To do a great blowout at home, work in small sections. This is where the clips are essential. I usually work with seven or eight sections, but only clip off four sections at a time, on each side of my head. I dry each section at a time. I hold my hair taut with the brush making sure I point the dryer nozzle down toward the hair to seal in the cuticle. Once the section is dried, I wrap the ends around the round brush and again, pointing the nozzle down, add extra heat to the the section I am curling for about 10 seconds and then hit the cool button for about 30 seconds to lock in the curl. I move to the next section until my hair is completely dry. After all the clips are out, I curl back a few of the pieces that need more curl, again using the round brush and a quick heat/cool blow. When finished, I usually flip my head over and spray with my favorite hair spray and then flip back upright. I then just use my hands to separate some pieces and then make sure every hair is in place before I give it another mist of hairspray.

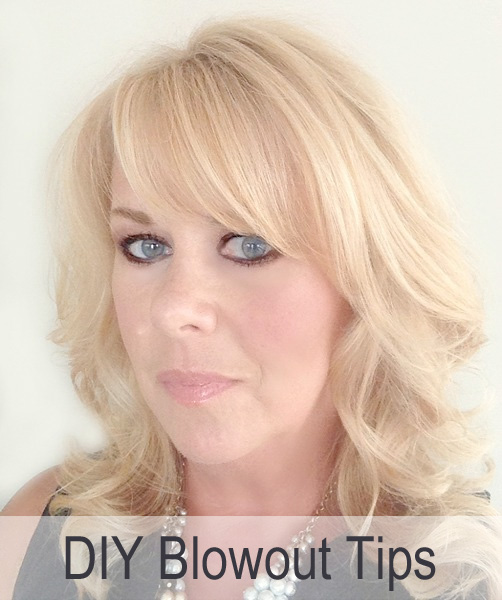
This is me after about a ten minute DIY blow out session with the Buttercup, Full Pint Brush and Hair Clips.

The hair dryer and clips can be purchased from QVC in their Drybar Blowout In-a-Box kit for $169.00. It also contains two different nozzles and an extra filter.

The Full Pint Medium Round Brush can be purchased at Sephora for $40.00.

Check out my Makeup Wars blogger friends to see their must have hair tools.